AlphaNow Admin Guide
As the admin of your Alpha in AlphaNow, you are responsible for the creation and management of the Alpha. If you are also a participant in the Alpha, you’ll have host abilities to help facilitate your Alpha sessions.
This guide is divided into three sections:
- Create an Alpha
- Manage an Alpha
- Run an Alpha
Each section will guide you on how to successfully use each function on AlphaNow. If you want to access a general overview of how to use Alpha Now, you can read about each feature here.
Before You Get Started
- We recommend that you have a maximum of 6 small groups per Alpha with a no more than 16 participants per small group.
- When joining the Alpha, ensure you are joining using your admin email address in order to access the needed administrator controls
- We recommend that AlphaNow is accessed via Mac Chrome, Windows Chrome, Android Chrome, or iOS Safari browsers.
- It is helpful to name all your test Alphas a “test” and remove the word “test” from any live Alphas.
Create an Alpha
- Log in to MyAlpha
- Go to your MyAlpha and use your log in credentials
associated with this account to log in and access the Alpha dashboard.
- Create an Alpha
- Click on the Create an
Alpha button.
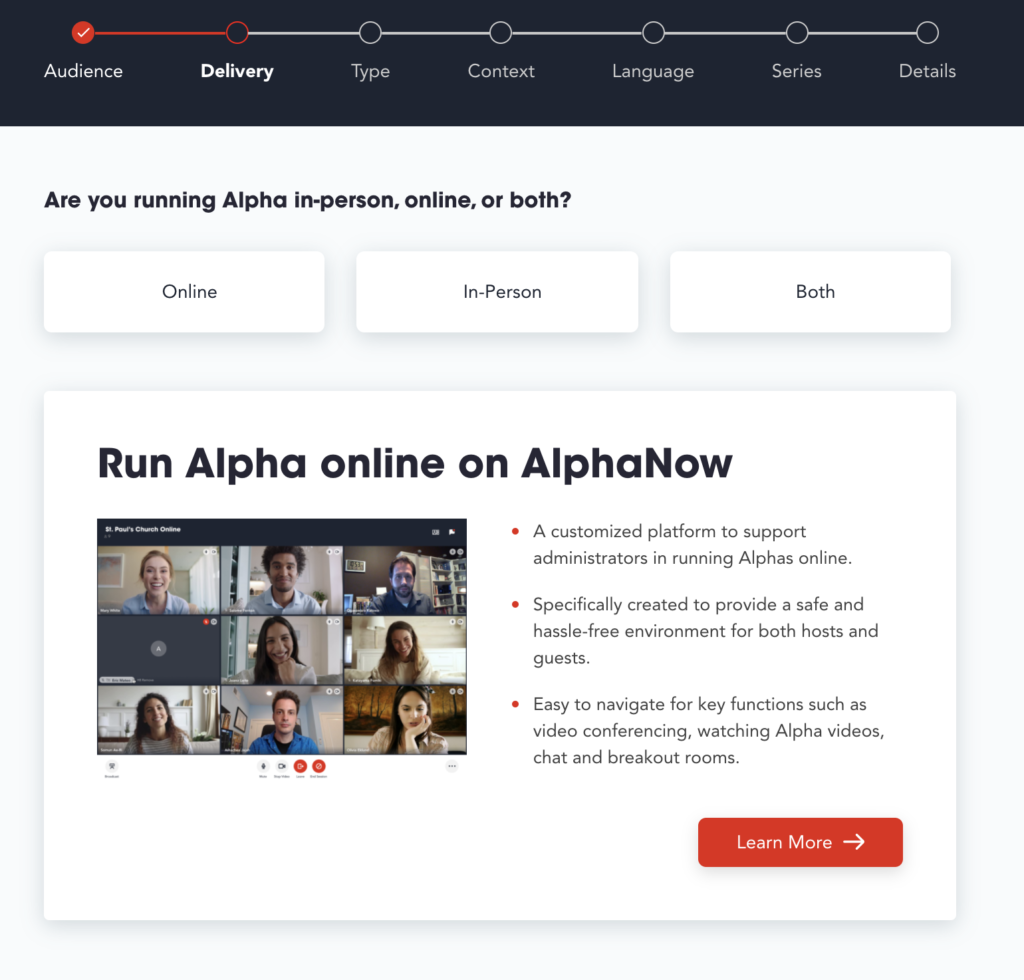
- Fill in your Alpha details
For delivery, select either online or both.
- You can also click on the Learn more button which will
redirect you to our product page. - Complete the steps as prompted, filling in your course name, country, language and description.
- Set up your Alpha on AlphaNow
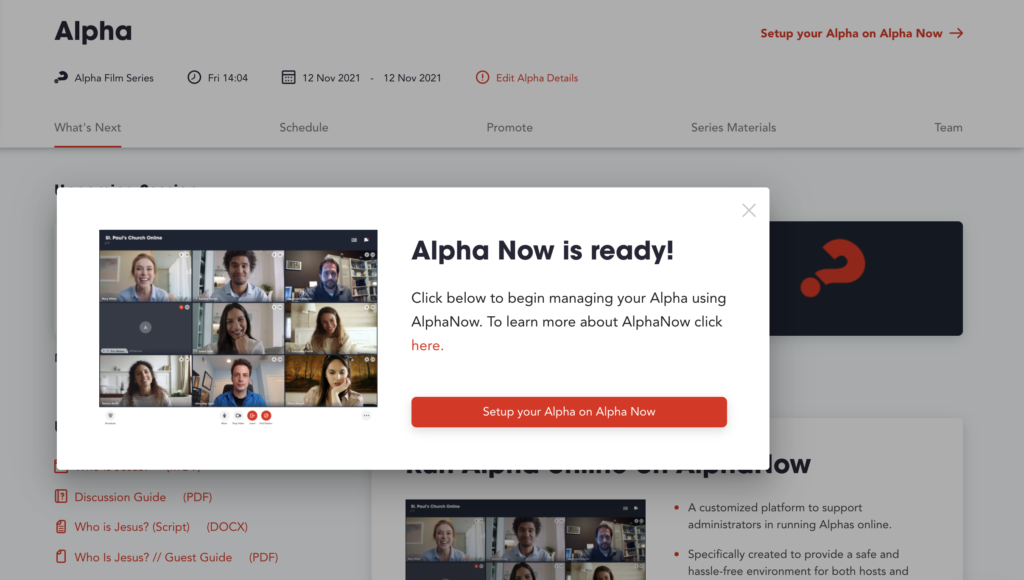
- After creating your Alpha, you will see the Setup your Alpha on AlphaNow button in the top right corner of your Alpha page.
- Click the Setup your Alpha on Alpha Now button.
- A confirmation pop-up will appear.
- Click the Setup your Alpha on AlphaNow button to be redirected to AlphaNow.
- After signing in, you will go to the Manage page of the newly created Alpha which will use the same name and description seen in MyAlpha.
- The Alpha Language is the same language you were using in MyAlpha. This can be changed.
- Currently AlphaNow is available in English and Spanish (Latin American)
Alpha courses created within MyAlpha will be automatically synced to AlphaNow the first time you set up your course. Any changes made in either platform after the initial set up, will have to be entered manually in both AlphaNow and MyAlpha.
Manage an Alpha
Alpha Details
How to edit your Alpha details:
- The Alpha name will be the displayed name shown on participants’ dashboards, waiting room, and within the Alpha sessions
- The Alpha language is the same as what was given when setup from MyAlpha. If the language from MyAlpha isn’t available yet in AlphaNow, it will default to English. You can change the language.
- The Alpha description is displayed as part of the Alpha on participants’ dashboards. Initially the description will be the same as what was given when setup from MyAlpha, but you can change it. The description should give participants useful details about the Alpha.
- As you make updates to the Alpha Details, on the right you can see how it will look on the dashboard card
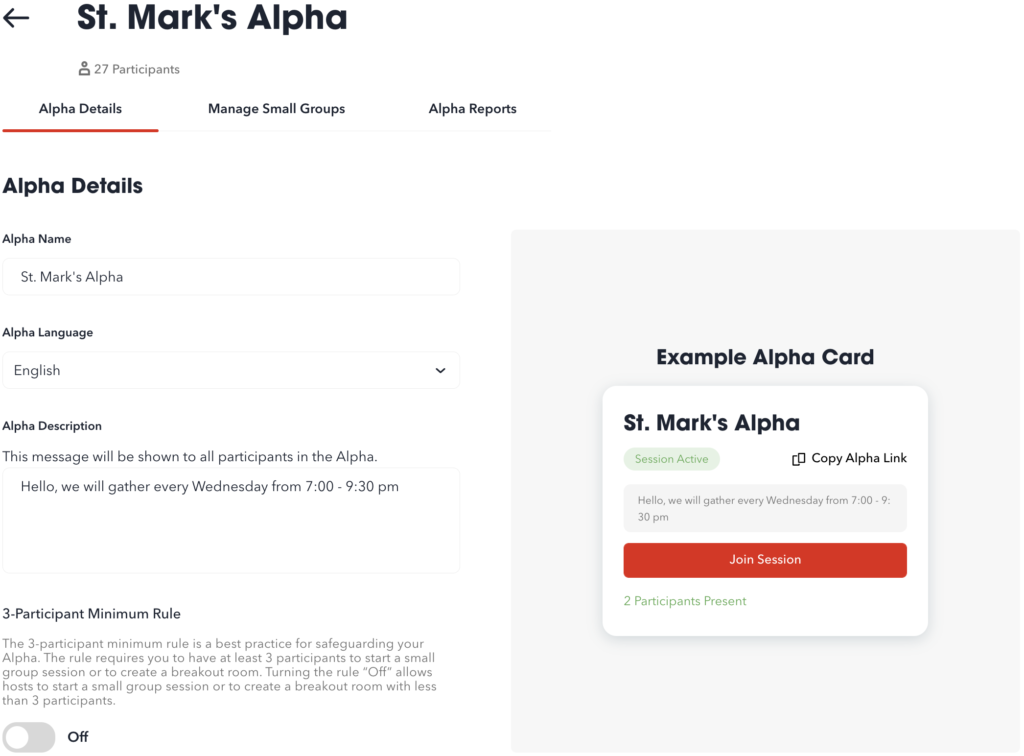
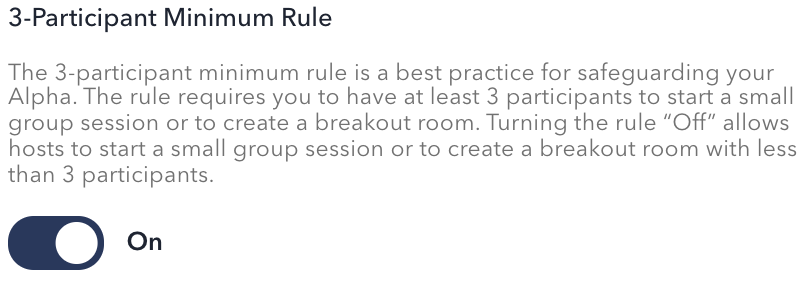
3-Participant Minimum Rule:
- The 3-participant minimum rule is a best practice for safeguarding your Alpha. The rule requires you to have at least 3 participants to start a small group session or to create a breakout room. By default, the rule is “On.”
- Turning the rule “Off” allows hosts to start a small group session or to create a breakout room with less than 3 participants. Please only turn this setting off if you have permission from your organisation’s Safeguarding (Protection of Vulnerable People) Officer or person responsible for online safety as you and your organisation are at increased risk in this respect.
Managing Small Groups
How to share the Alpha with participants
Web Participants
- Add participants with their emails
- Assign participants to small groups
- Copy and share the link below to allow guests and team members to join this Alpha
Mobile App Participants
- Add participant emails & assign them to a small group
- Share links to the mobile app in iOS & Google Play stores
- Share the Alpha ID listed to allow guests to join this Alpha (Alpha ID is required for use with the app)
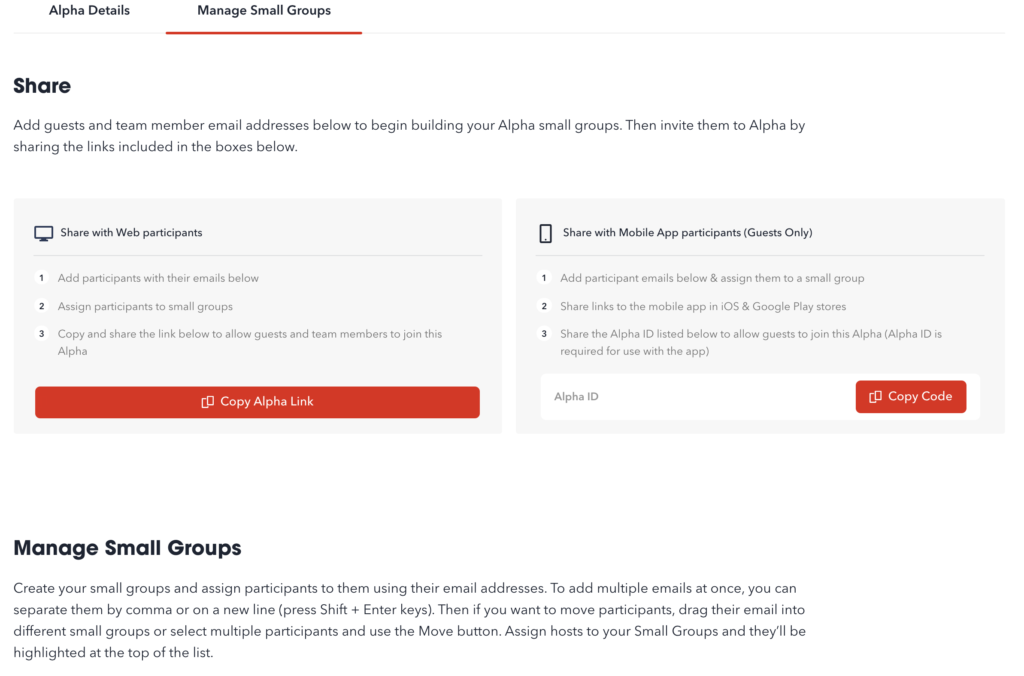
How to create a small group
- Click the Add new group button
- Click on the small group name to edit the name
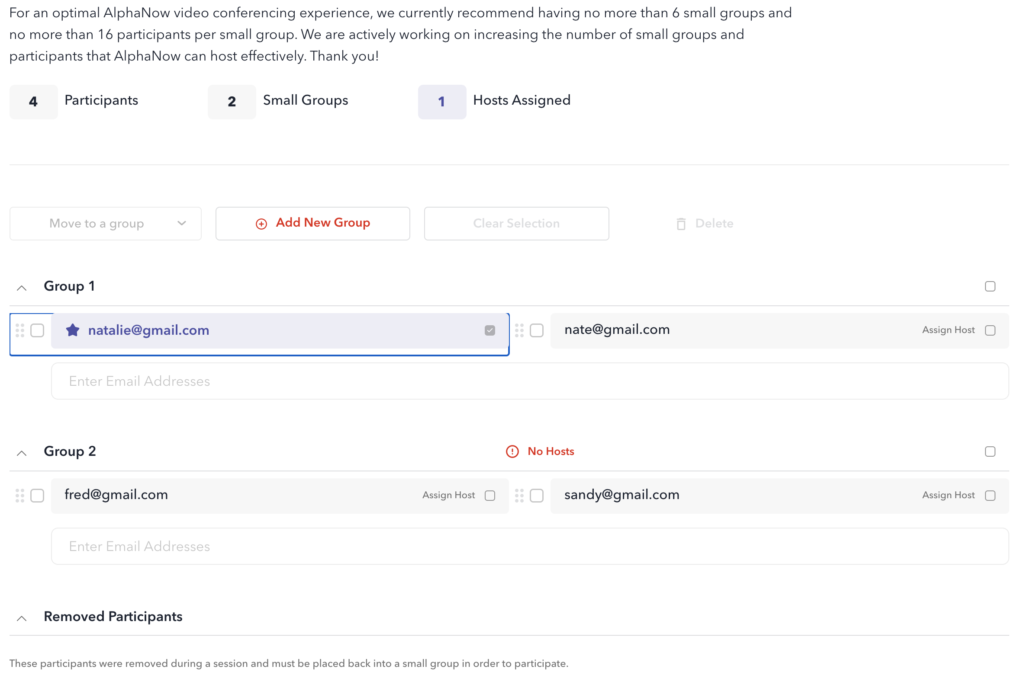
How to add participants to a small group
- In the Enter Email Addresses section of the small group you want to add to, enter the email address of each new participant.
- If you want to add multiple email addresses, you can copy and paste in a list or add new ones in the same section by separating each email address with a comma (,) or on a new line (Shift + Enter)
- When you’re done, press Enter
How to move participants to a different small group
- To move one participant, click on an email and keep pressed on the email.
- To move more than one email at once
- Click on the left-side box of each participant you want to select
- Click on the Move to a group button which will show a dropdown of all the available small groups
- Click on the small group name where you want the selected participants to be moved to
How to make a participant a host
- Click on the Assign Host box on the left side of the participant you want to make a host
- The box will be checked, and the email is highlighted in purple
How to delete a participant
- Click on the left-side box of each participant you want to move
- Click Delete
How to delete a small group
- Click on the top-right box of the small group you want to delete
- Click Delete
How to un-remove a participant
- All participants that were removed during an Alpha session are listed in the Removed Participants section
- To un-remove one participant, click on an email and keep pressed on the email. Move/drag the email into a group
- To un-remove more than one email at once
- Click on the left-side box of each participant you want to select
- Click on the Move to a group button which will show a dropdown of all the available small groups
- Click on the small group name where you want the selected participants to be moved to
Alpha Reports
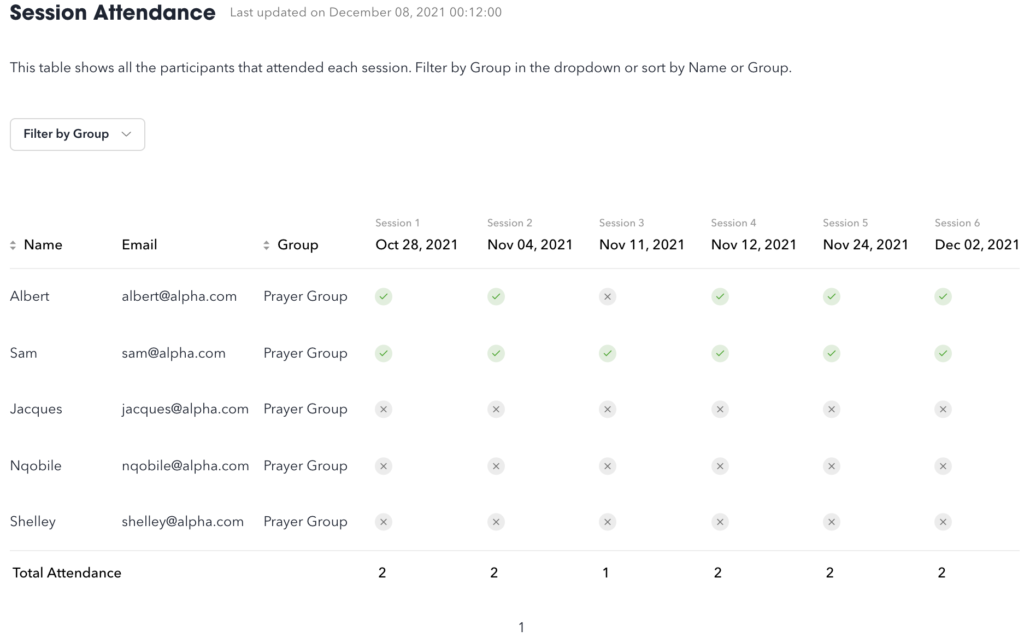
Session Attendance
- The Session Attendance report displays all the participants in the Alpha (name, email, and small group) and notes which sessions in the Alpha they joined
- Each session is labelled in chronological order along with the date when the session started
- There will be a green check if the participant was at that session
- There will be a grey “X” if the participant was not at that session
- At the bottom you will see a summary of the total attendance of each session
- The report shows 12 participants at a time, if there are more than 12 participants in the Alpha, you will see a list of other pages to switch and see other participants
- You can click on the Filter by Group button to select which groups of participants you only want to see
Run an Alpha
Starting your session
When you log into your AlphaNow page, you will be able to see cards for each of the Alphas you are a part of. The Alphas You’re Managing section of the dashboard will show the Alphas that you have created. The course admin and hosts all have the ability to open the waiting room, if you wish to do so, click the Open Waiting Room button. Once the waiting room is open, click Join Waiting Room.
Waiting Room
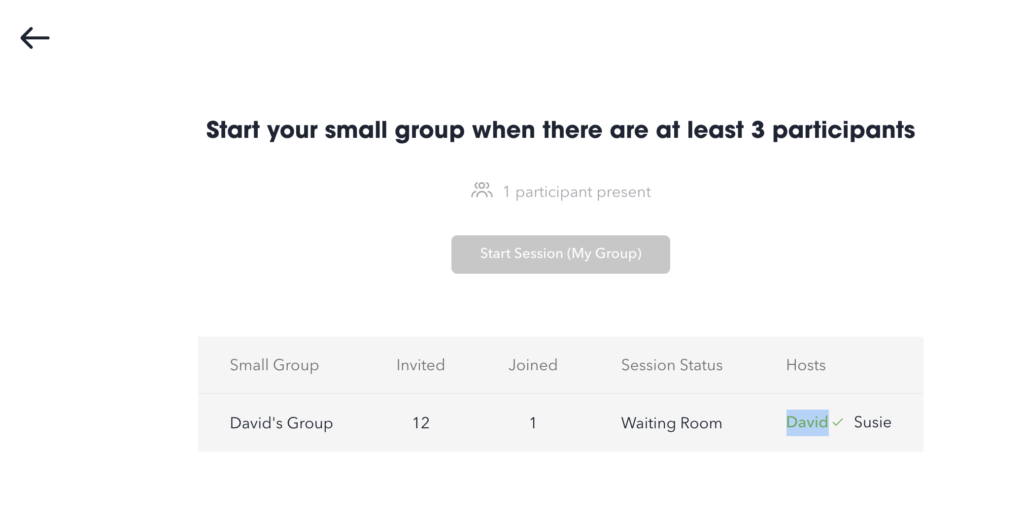
Once you join the Waiting Room, as Admin you will see an overview of each small group in the Alpha. You will also see the number of invited participants, how many have joined so far, the status of the session and the names of other hosts.
Hosts that are present will be displayed in green and marked with a check.
The Start Session button will only activate once a minimum of two other participants are present in the group Waiting Room, unless the 3-participant minimum rule is off. You can then start your small group.
Session Controls
During the session, you have ability to manage and run your small group.

How to broadcast yourself as the main speaker
- Click the Broadcast button in the bottom left-hand corner of the screen and select Broadcast Yourself.
- A 5-second countdown will be shown to all participants before you are broadcast as the main speaker on the screen.
- As the main speaker, your screen, video and audio are visible to all participants.
- To end the broadcast, click on the Broadcast button again and select Stop Broadcast Yourself.
How to broadcast video
To play Alpha talk Vimeo videos or YouTube videos:
- On the bottom left of your screen, you will see a broadcast button, click this and select Broadcast Video.
- A pop-up will appear prompting you to enter a Vimeo or YouTube URL.
- Copy and paste the URL in that field and click Start Video.
- After a 5-second countdown, the video will begin playing for all participants.
- You can pause, play, or change the playback time of the video for all participants.
- To end the broadcast, click on the Broadcast button again and select Stop Broadcast Yourself.
- To return to broadcasting yourself, click on the Broadcast button and select Broadcast Yourself.
- To return to broadcasting a video click on the Broadcast button and select Broadcast Video.
- If you want to play the same video again, you have two options. Click Resume to watch the video from the timestamp you stopped broadcasting previously. Click Start From Beginning to watch the video from the beginning.
- If you change the video URL, you only have the option to click Start From Beginning
How to screen share
To screen your desktop’s entire screen, a window, or a tab (Chrome only). While screensharing, the broadcast’s audio and video can be seen and heard by web participants and the broadcaster’s audio can be heard by mobile app participants. The broadcaster can share their device’s audio if they are on MacOS Chrome and share a Chrome tab or are on Windows Chrome and share their entire screen or a Chrome tab
- On the bottom left of your screen, you will see a broadcast button, click this and select Screen Share.
- A pop-up will appear prompting you with three sharing options
- Choose Entire screen to show participants your whole screen. Choose Window to select a window on your desktop to share. If you are on Chrome, choose Chrome Tab
- Choose Share tab audio if you want your device’s sound to be heard by all participants too.
- When you’re finished with your selection, click Share to start the screen share
How to mute video and audio
On the top right of each participants’ screen, you will see the Microphone icon and the Camera icon.
- To mute audio, click on the Microphone icon of the participant you want to mute.
- To turn off video, click on the Camera icon of the participant whose video you want to turn off. Their video will no longer be visible to the group.
- Please note participants will be able to turn back on their microphone and camera after you turn them off. Also, you are not able to turn on their microphone or camera just turn them off
How to remove a participant
Removing a participant from an Alpha can only be done during the session. Once a participant is removed, they will be
unable to return to the session or any future sessions unless they are un-removed by the admin (see instructions in the How to un-remove a participant section).
- On the bottom left of each participants’ screen, you will see the participant’s name.
- Click on the name of the participant you want to remove from the Alpha.
- A pop-up window will appear asking you to confirm that you want to remove the participant.
- Select the Yes, remove them button.
Please note: You can remove guests and other hosts but are unable to remove an admin.
How to end your small group session
Ending the small group will move everyone in your small group back to the dashboard and render the session inactive.
The small group session will also automatically close when there are no more participants left.
- The End Small Group button can be found at the bottom of the screen. Click this button.
- A pop-up will appear asking you to confirm your option.
- If you are sure you want to end your small group session, click End my small group.
Alternatively…
- During the active small group session, go to the Dashboard.
- Click on the elipses icon characterised by three dots on the top right of the Alpha card representing your Alpha.
- Click the End Small Group button.
- A pop-up will appear asking you to confirm your option.
- If you are sure you want to end your small group session, click End my small group.
How to end all small group sessions
An admin can render all small group sessions inactive. All participants will be returned to the Dashboard.
- Go to the Dashboard and click the elipses icon characterised by three dots on the top right of the Alpha card.
- Click the End session for all groups button and confirm by clicking End for all in the pop-up that appears.